
How to Customize Intune Company Portal Branding
Learn how to create a custom Intune Company Portal branding policy: organization name, theme color, logos, brand image, support info, and app sources, plus how policy precedence works when a user gets more than one.

- Difficulty
- Beginner
- Time required
- 10 minutes
- Steps
- 7
- Platform
- Intune Company Portal
- Last tested
- September 18, 2026
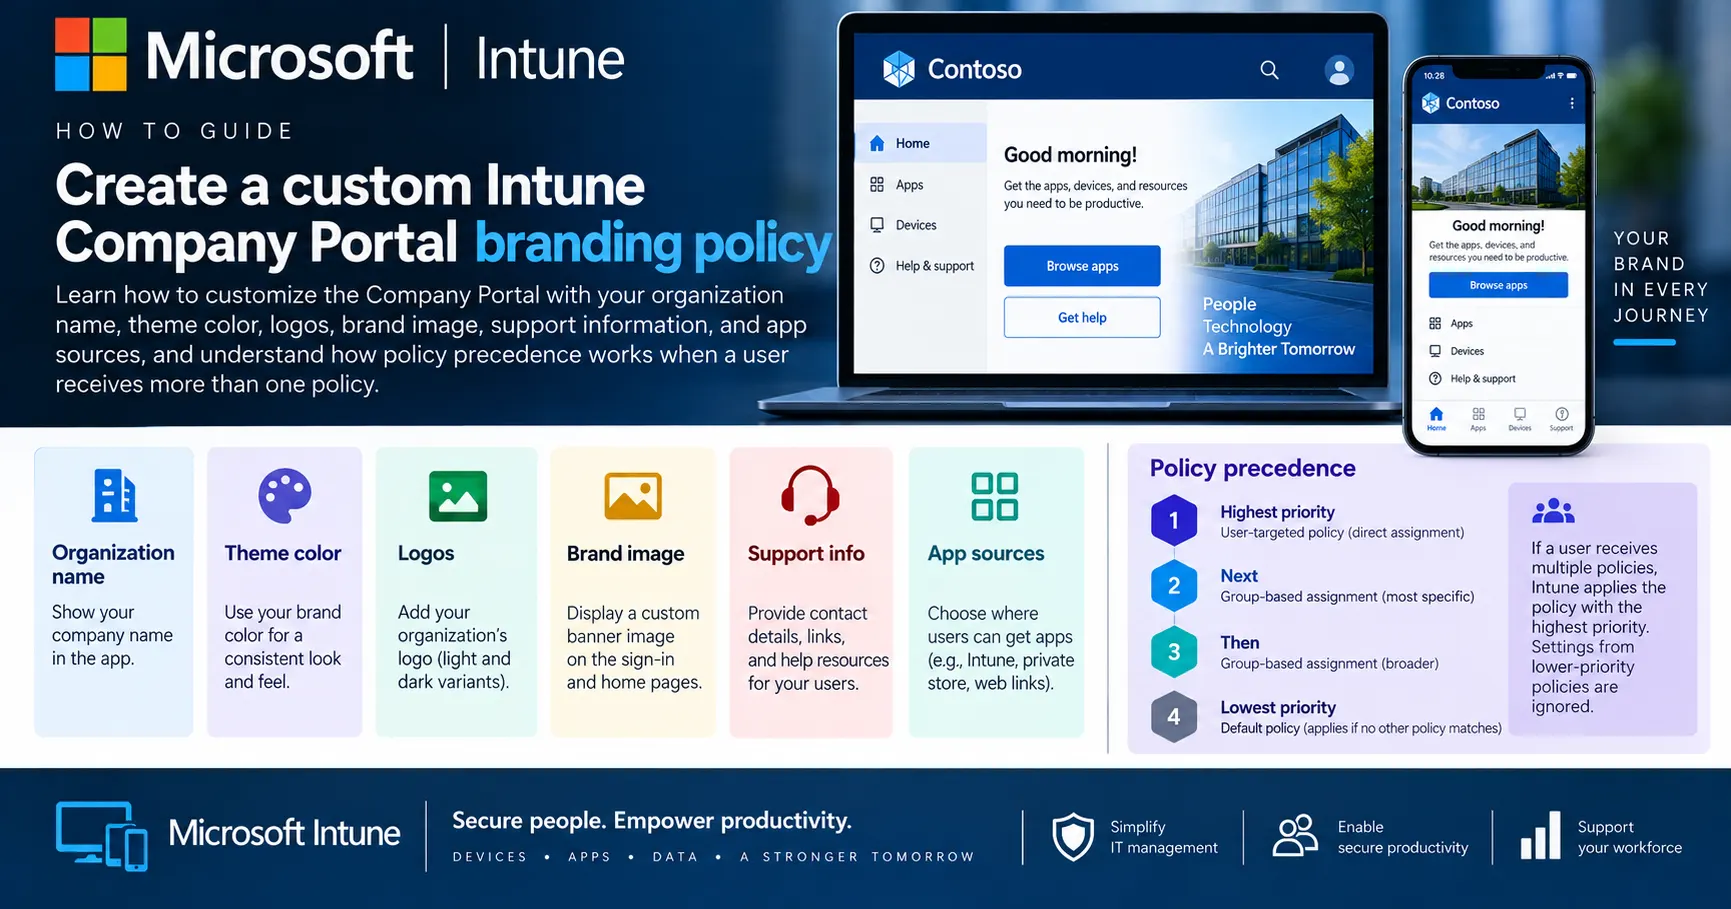
Table of contents
Quick Answer
Go to the stepsIn the Microsoft Intune admin center, go to Tenant administration > Customization and select + Create to build a custom branding policy. Configure your organization name, theme color, logos, support information, and app sources, then assign it to a user group. Up to 25 custom policies can exist per tenant.
- Go to Tenant administration > Customization and select + Create
- Fill in a name and description under Basics
- Set your organization name, theme color, and logos under Branding
- Add support contact details
- Choose which app sources to show, then assign the policy to a user group
Microsoft Intune admin center > Tenant administration > Customization > + CreateExpected result: A new custom branding policy appears in the Customization list, and members of the assigned group see your organization name, colors, and logo in the Company Portal within a short time after sync.
Key takeaways
- How to create a custom Company Portal branding policy in Intune, configure its branding, support information and app sources, and assign it to a user group.
- Consistent, recognizable branding in the Company Portal builds user trust during enrollment and app installs, and clear support details cut down on help desk confusion.
- A custom Company Portal branding policy replaces the default look and feel for its assigned user group, but only one policy ever applies per user, so keep group assignments and creation order in mind.
Introduction
Intune's Company Portal branding settings control how the Company Portal app, the Company Portal website, and the Intune app on Android look to your users. By default, everyone sees a generic Default policy. Creating a custom branding policy lets you apply your own organization name, colors, logos, and support details, and assign that look to specific user groups instead of your whole tenant.
Who this is for: IT admins and MSPs who manage end-user branding and support messaging for Intune-enrolled devices.
Before you start
- Access
- You need access to the Microsoft Intune admin center with permissions to create and assign Tenant administration customization policies.
- Required roles
- Intune Administrator
- Required licenses
- Microsoft Intune
- Environment
- A Microsoft Entra user group to assign the custom policy to (device groups aren't supported for branding).
- Vendor
- Microsoft
- Tested environment
- Microsoft Intune admin center, September 2026.
- Last tested
- Administrator permissions required
Tested in the Microsoft Intune admin center, September 2026.
About 10 minutes.
Warning: Avoid editing the Default policy
Don't edit the Default policy directly. It applies to every user in the tenant who has no custom policy assigned, so changes there affect everyone at once. Create a custom policy instead and assign it to a specific group.
Note: Policies aren't merged when a user has more than one
If a user belongs to more than one group with a branding policy assigned, Intune doesn't merge them. Per HTMD Blog's reporting, only one policy applies: the one created first among the assigned policies. Plan your group assignments and creation order accordingly.
1Open the Customization page
Reach the page where Company Portal branding policies are created and managed.
Microsoft Intune admin center > Tenant administration > CustomizationSign in to the Microsoft Intune admin center at intune.microsoft.com as an Intune administrator with sufficient permissions. From the left navigation pane, select Tenant administration, then choose Customization.
Expected result: The Customization page loads, showing the existing Default policy and any custom policies already created.
2Create a new custom branding policy
Start a new custom policy instead of editing the shared Default policy.
Tenant administration > Customization > + CreateOn the Customization page, select + Create to start a new custom branding policy. Avoid selecting Edit on the Default policy for this task, since that policy applies to every user without a custom policy assigned.
Expected result: The Create customization policy wizard opens, starting on the Basics step.
Note
Editing the Default policy directly changes what every unassigned user in the tenant sees.
3Configure the Basics section
Give the policy a clear name and description so it's identifiable later.
Create customization policy > BasicsOn the Basics page, enter a Name for the policy that identifies its purpose, for example a department or brand name. Add a short Description explaining what the policy is for and who it targets.
Expected result: The Basics fields are filled in and you can move to the Branding step.
4Configure organization name, color, and logos
Set the organization name, color, and logos users will see throughout the Company Portal.
Create customization policy > BrandingOn the Branding page, enter your Organization name (max 40 characters). Choose Color: pick Standard for one of five preset colors, or Custom to enter a hex code for your Theme color. Under Show in header, choose whether the header displays the organization logo and name, the logo only, or the name only. Upload a logo for theme color background (recommended height greater than 72 px, max 750 KB, PNG/JPG/JPEG, ideally with a transparent background) and a separate logo for white or light background with the same limits. Optionally upload a brand image (recommended width greater than 1125 px, max 1.3 MB, PNG/JPG/JPEG), which appears on the user's profile page across iOS, Windows, the web portal, and the Android Intune app.
Expected result: The preview panel updates to show your organization name, theme color, and uploaded logos as they'll appear to end users.
Note
Use a logo with a transparent background so it displays cleanly over your chosen theme color. Avoid a generic stock image for the brand image field; leave it blank if you don't have one that reflects your organization.
5Add support information
Give users a clear way to reach IT support from inside the Company Portal.
Create customization policy > Support informationFill in the support fields: Contact name (max 40 characters), Phone number (max 20 characters), Email address (max 40 characters, in the format alias@domainname.com), Website name (max 40 characters, a friendly label for your support site), Website URL (max 150 characters, in the format https://www.contoso.com), and Additional information (max 120 characters) for any extra support messaging.
Expected result: The Support, Help & Support, and Helpdesk pages in the Company Portal will show these details once the policy applies.
Note
Website name doesn't apply to the Intune app for Android; if you set a Website URL without a Website name, the raw URL is shown instead.
6Select app sources to display
Control which additional app catalogs are visible to this policy's users.
Create customization policy > App sourcesOn the App sources page, choose Show or Hide for each of Microsoft Entra Enterprise applications, Office Online Applications, and Configuration Manager Applications. Setting a source to Show displays that entire catalog to assigned users in the Company Portal.
Expected result: The App sources selections are set, controlling which extra app catalogs show up in the Company Portal for this policy's users.
Note
Configuration Manager Applications only appear in the Windows Company Portal. Entra Enterprise applications and Office Online applications appear in both the Windows Company Portal and the Company Portal website.
7Assign the policy and create it
Apply the finished policy to the intended set of users.
Create customization policy > Assignments > Review + createOn the Assignments page, select the Microsoft Entra user group this policy should apply to. Device groups aren't supported here. Review your settings on the Review + create page, then select Create to save and apply the policy.
Expected result: The policy appears in the Customization list, and the assigned group's members see the new branding after their next Company Portal sync.
Note
If this user is also targeted by another branding policy, only the policy created first among the ones assigned to them will apply; the two won't be merged.
Confirming the Custom Branding Applied
Confirm configuration
Once a custom branding policy is assigned and has synced to a device, users in the target group see the organization name, theme color, and logo you configured throughout the Company Portal app, the Company Portal website, and the Intune app on Android. The header shows the logo and name combination you picked in Show in header.
Normal result: The assigned user group sees your custom organization name, theme color, and logo instead of the generic Default branding, and the Support page shows the contact details you entered.
Abnormal result: If the user still sees the Default branding, check that they're a direct member of the assigned group (not just a nested member, if your tenant doesn't process nested groups the way you expect) and that no other, earlier-created policy is also assigned to them.
Show in header: Organization logo only
Logo only
The header displays only the uploaded logo image, no organization name text.
Show in header: Organization logo and name
Logo and name
The header displays both the uploaded logo and the organization name text side by side.
Troubleshooting
A user still sees the Default branding or the wrong custom branding after assignment.
Warning
Cause: The user is a member of more than one group with a branding policy assigned, and a different policy created earlier than yours is taking precedence.
Check every branding policy assigned to that user's groups and compare creation dates. Per HTMD Blog's reporting, Intune applies only the policy created first among those assigned, and doesn't merge settings from multiple policies. Consolidate the user into a single relevant group, or remove the conflicting assignment.
The new branding doesn't appear immediately after creating the policy.
Note
Cause: Branding changes can take time to sync to devices, and the Company Portal app may need to be reopened or the device resynced.
Give the policy some time to propagate, then have the user close and reopen the Company Portal app, or trigger a device sync from the Company Portal's Devices page.
A logo or brand image upload is rejected.
Warning
Cause: The uploaded file exceeds Intune's file size or dimension limits, or uses an unsupported format.
Confirm the logo files are PNG, JPG, or JPEG, under 750 KB, with a recommended height greater than 72 px. Confirm the brand image is under 1.3 MB with a recommended width greater than 1125 px. Re-export or compress the image with an image optimization tool if it exceeds these limits.
The policy doesn't apply to anyone even though it was created and assigned.
Critical
Cause: The policy was assigned to a security group of the wrong type, or to a device group instead of a user group.
Re-open the policy's Assignments page and confirm a user group, not a device group, is selected. Device group targeting isn't supported for Company Portal branding policies.
Frequently asked questions
Where does Intune Company Portal branding actually show up?
Company Portal branding applies to the Company Portal app, the Company Portal website, and the Intune app on Android. It does not apply to the Microsoft Intune app on other platforms beyond those listed by Microsoft.
How many custom Company Portal branding policies can I create?
Microsoft increased the limit from 10 to 25 custom branding policies per tenant, in addition to the single Default policy.
Can I assign a branding policy to a device group instead of a user group?
No. Custom branding policies can only be assigned to user groups. Device group targeting isn't supported for Company Portal customization.
What happens if a user is in two groups with different branding policies?
According to HTMD Blog's testing, Intune does not merge branding policies for a user in multiple assigned groups. Only one policy applies: the one that was created first among the policies assigned to that user.
What image sizes does Intune require for Company Portal logos?
The logo for a theme color or light background must be a PNG, JPG, or JPEG file no larger than 750 KB, with a recommended height greater than 72 pixels. The optional brand image should be greater than 1125 pixels wide and no larger than 1.3 MB, in the same file formats.
Conclusion
Creating a custom Company Portal branding policy means filling in a Basics section, a Branding section with your organization name, theme color and logos, a Support information section, and an App sources section, then assigning it to a user group. You can have up to 25 custom policies in a tenant alongside the Default policy.
A custom Company Portal branding policy replaces the default look and feel for its assigned user group, but only one policy ever applies per user, so keep group assignments and creation order in mind.
Microsoft Intune admin center > Tenant administration > Customization > + CreateSources3
Reader feedback
Written reviews
Loading reviews…